
Walking Cane Adjustment Pin Explained: How It Works and How to Use It Safely


Lightweight Vacuum Cleaner

Bed Exit Alarm Sensor

Large Print Keyboard
Quick Answer
A walking cane adjustment pin is the spring-loaded button that pops through a hole in an adjustable cane shaft and holds the cane at the selected height. Before putting weight on the cane, the pin should protrude completely through the hole, and any locking collar should be tightened. Correct cane height also matters; MedlinePlus cane guidance recommends positioning the handle around wrist level with the elbow slightly bent.
What the adjustment pin does
- Locks the height: The pin enters an adjustment hole and stops the inner tube from sliding.
- Allows resizing: Pressing the pin inward lets you shorten or lengthen a telescoping cane.
- Provides confirmation: A visible pin and often an audible click show that the chosen hole has engaged.
- Works with the collar: Many canes also use a locking collar to reduce movement and rattling between the tubes.
- Needs inspection: A damaged, stuck, or partly engaged pin can make an adjustable cane unsafe.
Before walking
- Push and pull the shaft lightly before use. It should not slide to another height.
The small metal button on an adjustable cane looks simple, but it performs an important job. If it isn’t fully seated, the cane may shorten unexpectedly when you lean on it.
I always treat the adjustment pin as one of the first things to check on a cane. In this guide, I’ll explain the mechanism, correct adjustment, common problems, maintenance, and signs that the cane should be replaced.
In This Guide
- What Is a Walking Cane Adjustment Pin?
- How Does a Cane Adjustment Pin Work?
- How Do You Adjust a Walking Cane Safely?
- How Do You Know the Cane Is the Correct Height?
- Adjustment Pin vs Locking Collar: What Is the Difference?
- Why Is My Cane Adjustment Pin Stuck or Loose?
- How Should You Inspect and Maintain the Adjustment Pin?
- When Should You Stop Using or Replace the Cane?
- Frequently Asked Questions
What Is a Walking Cane Adjustment Pin?
A walking cane adjustment pin is a spring-loaded metal button inside the telescoping shaft of many adjustable canes. It extends through one of several holes to lock the cane at a chosen height.
You may also hear it called a push button, snap button, height-adjustment button, spring button, or locking pin. These names usually describe the same basic mechanism.
Where is the adjustment pin located?
Look along the lower or middle section of an adjustable aluminum cane. You’ll normally see a row of holes and one small button protruding through a selected hole.
Inside the shaft, a spring pushes that button outward. Pressing the button compresses the spring and lets one tube slide inside the other.
Simple definition: The adjustment pin is the part that changes a telescoping cane from a sliding tube into a fixed-length walking aid.
Why is such a small part important?
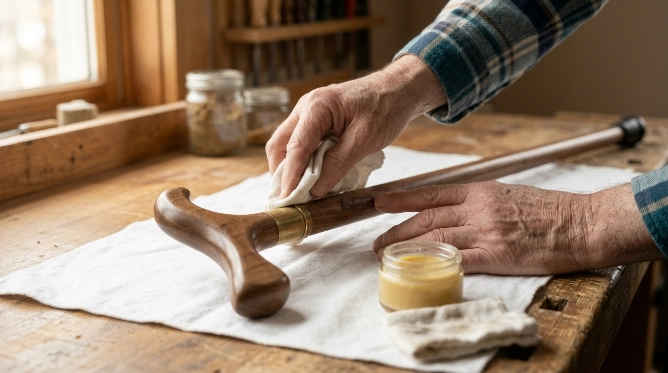
The pin prevents the inner and outer cane tubes from moving lengthwise. That makes its position important whenever the user applies downward pressure to the handle.
The pin isn’t the only safety component. The shaft, locking collar, handle, rubber tip, and adjustment holes must also remain in sound condition.
How Does a Cane Adjustment Pin Work?
The mechanism uses a spring-loaded button, telescoping tubes, and aligned holes. When the button reaches an adjustment hole, spring pressure pushes it outward and locks the tubes at that position.
It’s a simple mechanical system. That’s one reason adjustable canes can be resized without tools.
What happens when you press the pin?
- Your finger pushes the metal button inside the outer tube.
- The button clears the edge of the adjustment hole.
- The inner cane tube becomes free to slide upward or downward.
- You move the tube until another adjustment hole aligns with the button.
- The spring pushes the button outward through the new hole.
On many canes, you can hear or feel a click when engagement occurs. More important, you should visually confirm that the button has come completely through the hole.
Some designs then use a threaded collar around the shaft. A push-button cane with a locking collar uses the collar as an additional securing and stabilizing feature.
Does the pin carry all the load?
The cane works as a complete structure rather than as one isolated button. The pin controls the tube’s position, while overlapping tubing and other locking components help keep the shaft aligned.
That is why a pin shouldn’t be treated as safe merely because it is visible. Bent tubing, enlarged adjustment holes, or a damaged collar can still make the cane unreliable.
How Do You Adjust a Walking Cane Safely?
Loosen the locking collar if the cane has one, depress the adjustment button, move the telescoping section, and let the pin fully engage the desired hole. Then tighten the collar and test the shaft before walking.
I prefer to make height changes while the cane is unloaded. Don’t lean on the handle while you’re trying to release the pin.
Step-by-step cane adjustment
- Stand or place the cane securely. Keep the rubber tip on a stable surface or hold the cane horizontally while adjusting it.
- Loosen the collar. If your cane has a threaded locking collar, loosen it according to the manufacturer’s instructions.
- Press the pin fully inward. It must clear the adjustment hole before you slide the tube.
- Move the shaft slowly. Shorten or lengthen the cane without twisting or forcing the tubing.
- Align the next hole. Allow the spring-loaded button to pop through the selected opening.
- Check the button visually. It should protrude fully rather than sit halfway inside the hole.
- Tighten the collar. Make it secure without using excessive force.
- Test the cane. Push and pull the tubes gently before putting normal walking pressure on the handle.
Safety check: If the button does not fully protrude, don’t use the cane. Readjust it or have the mechanism inspected.
A half-engaged pin can look close enough from a distance. I always run a fingertip over the opening and make sure the button is clearly seated.
How Do You Know the Cane Is the Correct Height?
A common fitting starting point is to place the cane handle around the wrist crease while standing upright with the arm relaxed. The elbow should remain slightly bent when the handle is held.
Mayo Clinic cane-fitting guidance describes an elbow bend of about 15 to 30 degrees and recommends checking wrist height.
Quick cane-height checks
| Check | Typical Target | Possible Sign of Poor Fit |
|---|---|---|
| Handle position | Near the wrist crease while standing upright | Shoulder lifting or leaning sideways |
| Elbow angle | Slight bend; Mayo Clinic notes roughly 15–30 degrees | Locked-straight or deeply bent elbow |
| Posture | Upright and comfortable | Hunching, reaching, or side bending |
| Walking feel | Natural placement without lifting the shoulder | Cane feels awkward, too far away, or hard to place |
Shoes matter too. Adjust the cane while wearing the type of footwear normally used for walking, because sole height can change the effective fit.
The American Academy of Orthopaedic Surgeons guidance also places the top of the cane near the wrist crease with a slight elbow bend.
Health note: If pain, weakness, recent surgery, poor balance, or an unusual gait affects your cane use, ask a physical therapist or healthcare professional to check the fit.
Adjustment Pin vs Locking Collar: What Is the Difference?
The adjustment pin selects and mechanically holds the cane’s height. A locking collar usually tightens around the telescoping connection to reduce movement and provide additional security.
The two parts therefore shouldn’t be confused. On canes equipped with both, they work together.
| Component | Main Job | What to Check |
|---|---|---|
| Adjustment pin | Locks the telescoping tube at a selected hole | Pin protrudes fully and springs back freely |
| Adjustment holes | Provide preset height positions | No cracking, distortion, or badly enlarged holes |
| Locking collar | Tightens the tube connection and can reduce play | Threads engage and collar tightens normally |
| Rubber tip | Provides traction against the walking surface | Tread is not worn smooth, split, or loose |
A tightened collar should not be used to hide a pin that isn’t engaging correctly. If the button won’t lock into its hole, the adjustment mechanism needs attention.
Why Is My Cane Adjustment Pin Stuck or Loose?
A pin may stick because of dirt, corrosion, misaligned tubing, mechanical damage, or a weakened internal spring. A loose-feeling cane can also come from worn holes or play between the telescoping tubes.
Don’t keep pressing harder if the mechanism feels abnormal. First remove all body weight from the cane.
Common adjustment-pin problems
- Pin will not press inward: Dirt or corrosion may restrict movement, or the button may be loaded against the edge of the hole.
- Pin stays inside: The spring mechanism may be jammed, damaged, or no longer pushing the button outward correctly.
- Pin only comes out halfway: The tubes may not be aligned with the hole.
- Cane rattles: The locking collar may be loose, or normal clearance between telescoping sections may have increased.
- Pin pops out of position: Stop using the cane because the button, spring, tube, or adjustment hole may be damaged.
- Hole looks stretched: Repeated wear may have distorted the opening and reduced secure engagement.
Can you lubricate a stuck adjustment pin?
Follow the manufacturer’s cleaning and maintenance instructions first. Oil or grease can attract dirt, and some cane manufacturers may not recommend lubricating the mechanism.
A dry cloth and careful cleaning around the hole may be enough for surface debris. Don’t dismantle a load-bearing mobility aid unless its instructions specifically allow that repair.
Important: A cane that unexpectedly changes height should be taken out of service until the cause is identified.
How Should You Inspect and Maintain the Adjustment Pin?
Check the adjustment mechanism before use, especially after changing the cane’s height. The inspection takes only a few seconds.
I use a simple rule: look, press, lock, then test.
Five-point inspection
- Look at the pin: It should protrude clearly through the adjustment hole.
- Press it once: When unloaded, it should move inward and return outward smoothly.
- Inspect the hole: Look for cracks, obvious distortion, sharp damage, or severe wear.
- Check the collar: Make sure it isn’t cross-threaded, cracked, or unable to tighten.
- Test the shaft: After relocking everything, gently try to slide the sections without pressing the button.
Also inspect the rubber tip. A secure adjustment pin cannot compensate for a worn tip that provides poor traction.
Keep the cane dry and reasonably clean. If it becomes wet outdoors, wipe the shaft and adjustment area before storage.
Why regular checks matter more for older users
A loose mobility aid can add another hazard for someone who already has balance or strength limitations. The CDC’s older adult fall-prevention resources emphasize that falls can be prevented and that maintaining safe mobility is important for independence.
Health note: Repeated falls, new dizziness, new weakness, or a sudden decline in balance should be discussed with a healthcare professional rather than addressed only by changing cane height.
When Should You Stop Using or Replace the Cane?
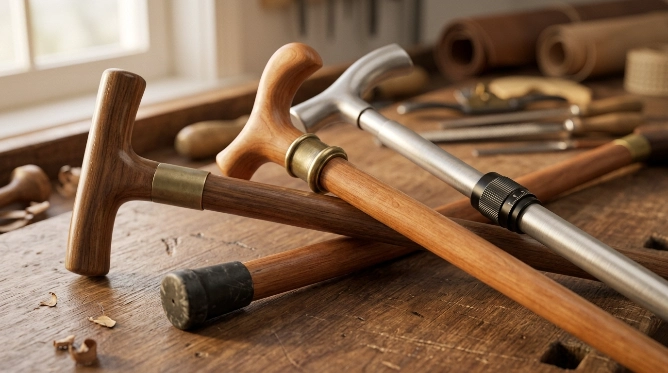
Stop using the cane if its adjustment system no longer locks securely. A cane is not a good place to improvise a temporary structural repair.
Replacement may be safer than repair when a load-bearing component is damaged.
Warning signs that deserve attention
- The adjustment pin does not fully emerge from the hole.
- The cane changes length when downward pressure is applied.
- The shaft is bent, cracked, heavily dented, or visibly distorted.
- An adjustment hole is enlarged, torn, or misshapen.
- The locking collar spins without tightening.
- The pin remains stuck despite basic cleaning and correct alignment.
- The cane feels less stable than it did previously.
A missing pin should never be replaced with a nail, screw, wire, or similar homemade substitute. Those items may not reproduce the original locking mechanism or load-bearing behavior.
When should a professional check the cane?
A physical therapist can help when you’re unsure about cane height, walking technique, or whether a cane provides enough support. A medical equipment supplier may also help identify a compatible replacement device.
If you need much more support than the cane provides, don’t simply lean harder on it. Your healthcare professional may recommend another mobility aid after assessing balance, strength, and walking needs.
Frequently Asked Questions
What is the button on an adjustable walking cane called?
It is commonly called an adjustment pin, push button, snap button, spring button, or height-adjustment button. It is spring loaded and engages one of the holes in the telescoping shaft to hold the selected cane height.
Should the adjustment pin stick all the way through the hole?
Yes. The button should normally protrude completely through the selected adjustment hole before the cane is used. If it sits partly inside the hole, realign the tubes and allow it to engage fully.
Why does my cane still rattle after the pin clicks in?
A small amount of movement can come from clearance between telescoping tubes. If the cane has a locking collar, make sure it is properly tightened. Increasing looseness, damaged holes, or unstable shaft movement should be inspected before continued use.
Can I replace a broken adjustment pin myself?
That depends on the cane design and manufacturer instructions. Because the adjustment system helps secure a weight-bearing mobility aid, avoid improvised repairs. Contact the manufacturer, medical equipment supplier, or a qualified professional when the pin or internal spring is damaged.
How high should my walking cane be?
A common fitting guideline places the handle near the wrist crease while you stand upright with your arm relaxed. Your elbow should remain slightly bent while holding the cane. Individual medical or mobility needs may require a professional fitting.
What if the adjustment button will not pop back out?
Remove weight from the cane and check whether the hole and button are aligned. If the button remains inside, feels jammed, or has lost its spring action, stop using the cane until the mechanism can be inspected.
Do all walking canes have adjustment pins?
No. Fixed-length wooden and metal canes may have no height-adjustment mechanism. Telescoping adjustable canes commonly use push buttons, while some designs use different clamps, clips, or locking systems. Follow the instructions supplied with your particular cane.
Final takeaway: A walking cane adjustment pin is small, but it is central to keeping an adjustable cane at the intended height. Make sure it fully engages, secure the locking collar if fitted, check the cane’s overall condition, and never rely on a damaged adjustment mechanism.
If the cane feels unstable or your walking needs have changed, have the fit and mobility aid reviewed by a healthcare professional before continuing to depend on it.